


5 Min Routine to Read Piano Sheet Music for Adults from Danpianostudio

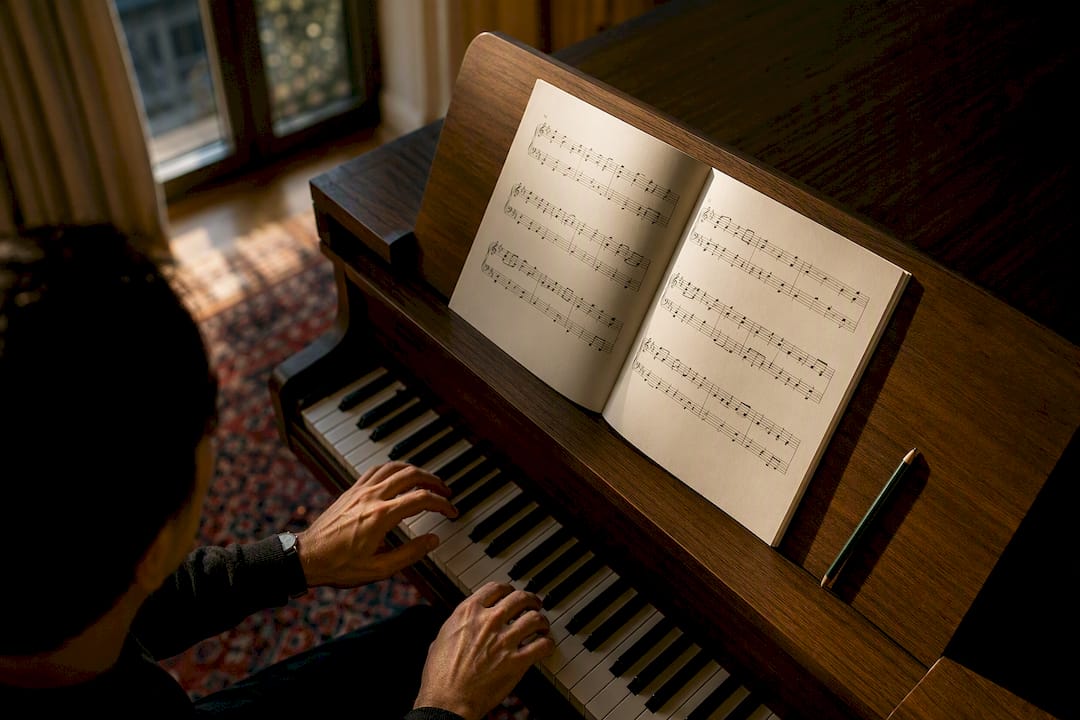
Yes, a beginner can learn to read piano sheet music, and it doesn’t take years. Start by learning the staff and clefs, map middle C onto the keyboard, then practise rhythm with a metronome before adding pitch. Do this consistently and you’ll name notes within weeks; fluent sight-reading follows in a few months of regular practice.
TL;DR:
Focusing on landmark notes and counting from middle C, treble G, and bass F makes reading notes faster and easier without memorizing all keys.
Practicing rhythm with a metronome and subdividing beats enhances timing and prevents beginners from prioritizing pitch over rhythm.
Short daily sessions combining note recognition, rhythm drills, and slow play accelerate sight-reading skills more effectively than infrequent long practice.
Mastering hand separation and correct fingering early prevents bad habits that slow progress and ensures smoother transitions between notes.
Recognizing and correctly interpreting repeat signs, codas, and tempo markings prevent structural mistakes and improve overall performance accuracy.
Table of Contents
What are the staff and clefs on a piano score?
The staff is the five-line grid that notation lives on, and a clef tells you which pitches those lines and spaces represent. Piano music uses two staves stacked together, called the grand staff, because the instrument covers a wider pitch range than one staff alone can show.
The treble clef (the curly symbol that loops around the second line) governs the top staff and covers the higher notes, generally played with the right hand. Its lines, from bottom to top, spell E, G, B, D, F, remembered by generations of learners as “Every Good Boy Deserves Favour.” The spaces spell F, A, C, E, which conveniently reads as a real word.
The bass clef (the symbol with two dots flanking a line, sometimes called the F clef) governs the lower staff, usually the left hand’s territory. Its lines read G, B, D, F, A, often memorised as “Good Boys Do Fine Always.” The spaces spell A, C, E, G, which you might recall as “All Cows Eat Grass.”
Where the two staves meet is where middle C sits, on a short floating line called a ledger line, just below the treble staff and just above the bass staff. This single note is your anchor point for the entire keyboard.
Treble clef: right-hand range, lines EGBDF, spaces FACE
Bass clef: left-hand range, lines GBDFA, spaces ACEG
Grand staff: treble and bass staves joined by a brace
Middle C: the shared reference point between both staves
A structured approach that begins with the staff and clefs before anything else is what separates learners who progress quickly from those who stall on note names for months.
How do you match notes on the page to keys on the piano?
Forget memorising all 88 keys one by one. Anchor yourself to three landmark notes and count outward from them: middle C (just left of the group of two black keys nearest the centre of the keyboard), treble G (the second line of the treble staff, roughly two octaves above middle C), and bass F (the second line from the top of the bass staff, roughly two octaves below middle C).
Counting from a landmark works because the musical alphabet only runs A to G before repeating. If you know a note is a landmark, the next note up or down the staff is simply the next letter in the sequence. Ledger lines extend the staff for notes that sit outside its five lines, and they follow exactly the same counting logic, just further from the anchor.
Try these three short drills to build the skill:
Flash cards: shuffle a deck of note cards for two minutes and say each name aloud before checking.
Three-minute landmark drill: place a finger on middle C, then find treble G and bass F without looking down.
Quick sight-name exercise: open any beginner score and name ten notes in a row, timing yourself.
Pro Tip: Cover the note names printed above beginner scores with a strip of paper. You’ll rely on counting from landmarks instead of reading printed hints, which builds the real skill faster.
Note values and rhythm: how long do you hold each note?
Pitch tells you what to play; rhythm tells you how long to hold it, and treating rhythm as secondary is one of the most common reasons beginners stall. A whole note lasts four beats, a half note two, a quarter note one, and an eighth note half a beat. Rests use matching symbols and mean silence for the same duration.
A dot placed after a note adds half that note’s original value, so a dotted half note (two beats plus one) lasts three beats. A tie is a curved line joining two notes of the same pitch, including across a bar line, and tells you to hold the combined duration as one continuous sound rather than replaying the note.
Whole note: 4 beats
Half note: 2 beats
Quarter note: 1 beat
Eighth note: 0.5 beats
Dotted note: add half the note’s value
Tie: combine durations across notes or bar lines without re-striking
Count aloud while you play, subdividing beats into “1-and, 2-and” for eighth notes, and keep a metronome running from the very first week. Rhythm is arguably as critical as note position, and practising with a metronome is the standard way professionals build steady internal time. Before you even touch pitch, clap or tap rhythm patterns from a page. Isolating rhythm this way trains your internal pulse so that when pitch returns to the mix, your timing doesn’t fall apart under the extra cognitive load.
How do you read time signatures and count the beat?
A time signature sits at the start of a piece as two stacked numbers. The top number tells you how many beats fill each bar; the bottom number tells you what kind of note counts as one beat.
4/4 (four quarter-note beats per bar) is the most common signature you’ll meet, followed by 3/4 (three beats, the waltz feel) and 2/4 (two beats, a marching feel). 6/8 is a compound metre: six eighth notes per bar, but felt as two groups of three rather than six separate pulses.
4/4: count “1, 2, 3, 4” per bar
3/4: count “1, 2, 3” per bar
2/4: count “1, 2” per bar
6/8: count “1-2-3, 4-5-6” grouped in twos
Tap the subdivisions with your foot while counting aloud before you play a single note. When a piece changes metre partway through, mark the new count in pencil above the bar. That small habit prevents the rhythmic stumble that catches out most sight-readers the first time they meet a metre change.
Key signatures and accidentals: what do sharps and flats actually change?
A key signature is a cluster of sharp or flat symbols placed right after the clef, and it applies to every instance of that note letter across the whole piece, not just one spot. See a sharp on the F line in the key signature, and every F you encounter, in any octave, is played as F sharp unless marked otherwise.
An accidental is a sharp, flat, or natural symbol placed directly in front of a note mid-piece, and its effect lasts only until the next bar line. A natural sign cancels a sharp or flat for that bar.
Key signature: affects every note of that letter name, for the whole piece
Accidental: affects only that specific note, until the bar ends
Sharp: raises a note by a half step
Flat: lowers a note by a half step
Beginners benefit from starting in C major, which has no sharps or flats at all, before moving to G major (one sharp) and F major (one flat). Play simple scales and short tunes in each key as you introduce it, and A guide to piano theory basics walks through the full circle of key signatures once you’re ready to expand beyond these first three.
What do dynamics and articulation marks tell you to do?
Dynamics tell you how loud or soft to play: p (piano, soft), mp (mezzo-piano, medium-soft), mf (mezzo-forte, medium-loud), and f (forte, loud). A widening wedge shape (crescendo) means gradually louder; a narrowing wedge (decrescendo) means gradually softer.
Articulation marks tell you how to shape individual notes. A dot above or below a note (staccato) means short and detached. A curved line joining several notes (a slur, indicating legato) means smooth and connected. A wedge or triangle above a note (an accent) means extra emphasis, and phrasing lines group notes into musical sentences.
p, mp, mf, f: soft to loud
Crescendo/decrescendo: gradually louder/softer
Staccato: short and detached
Legato/slur: smooth and connected
Accent: extra emphasis on that note
Pro Tip: When learning a new phrase, exaggerate the dynamics far beyond what’s written. Playing an extreme version first helps your ear and hands internalise the contrast, and you can dial it back to a musical level once the shape sticks.
What’s a practice routine that actually builds sight-reading speed?
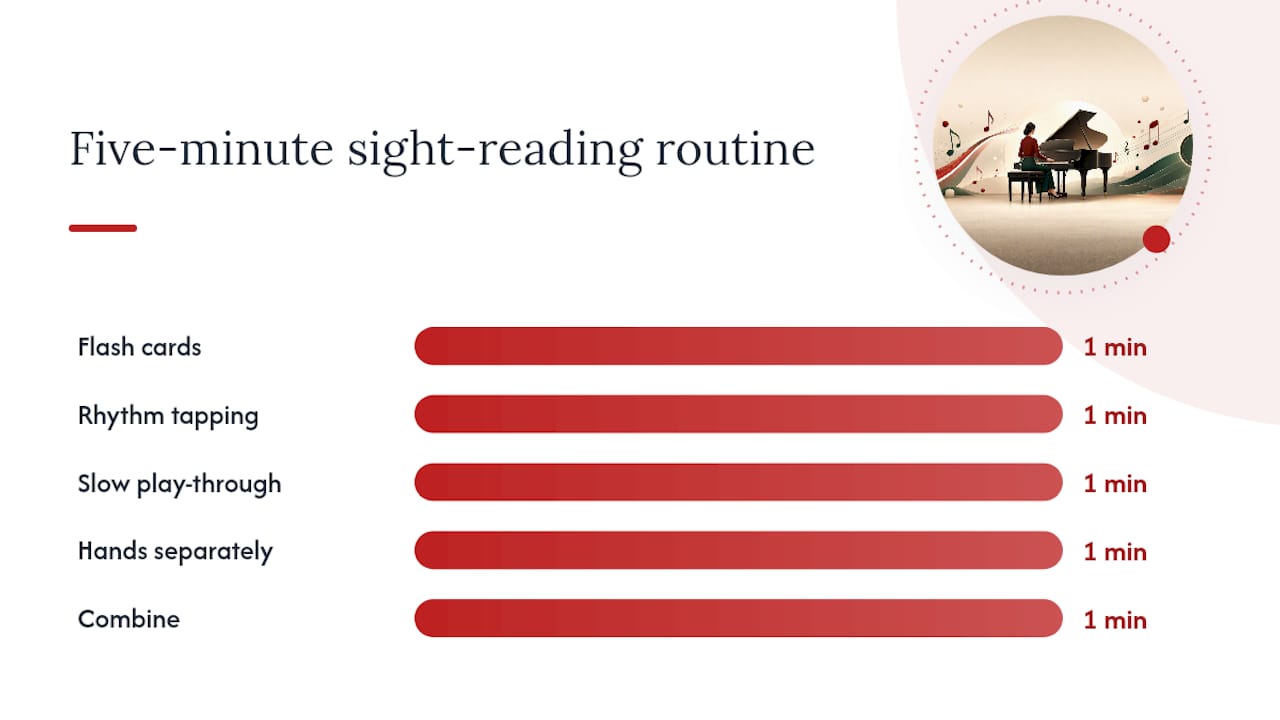
Sight-reading fluency comes from short, frequent, structured sessions, not marathon practice once a week. A five-minute block, repeated daily, does more for your reading than a single hour-long session on a Sunday.
Try this sequence each day:
Flash cards (one minute): rattle through note names to warm up recognition.
Rhythm tapping (one minute): clap or tap the rhythm of a new piece with no pitch involved.
Slow play-through (one minute): play the piece at half speed, prioritising accuracy over flow.
Hands separately (one minute): play right hand alone, then left hand alone.
Combine (one minute): put both hands together at a tempo you can sustain without errors.
This structure mirrors classroom-tested drills used by piano teachers to accelerate beginner progress, and it works because each step isolates one skill before layering in the next.
The single biggest jump in reading ability comes from training your eyes to look one or two beats ahead of where your hands are playing. Reading the note you’re about to play, rather than the one you’re currently playing, is what separates a fluent reader from someone decoding one note at a time.
Frequency beats duration: five to ten minutes daily outperforms occasional long sessions for building pattern recognition.
Graded repertoire matters: choose pieces roughly one grade below your current comfort level for fluency practice, and save harder pieces for slow, careful study.
Increase difficulty only once a piece feels genuinely easy, not just manageable.
A sight-reading routine guide and structured daily practice plans both expand on this five-minute framework if you want a longer-term structure to follow.
What mistakes slow down beginner piano readers?
Most reading problems trace back to a handful of habits that are easy to fix once you spot them.
Ignoring rhythm in favour of pitch: fix this with rhythm-only drills against a metronome before you ever add note names.
Playing both hands together too soon: fix this by mastering each hand separately first, then combining once each part feels secure.
Staring fixedly at the keyboard: fix this by deliberately practising reading ahead, glancing at your hands only briefly to confirm position.
Practising only pieces you already half-know: fix this by rotating in genuinely new, easier material specifically for sight-reading drills.
If progress plateaus despite consistent practice, or you’re preparing for an ABRSM or Trinity exam, a teacher can diagnose technique issues that are invisible from the inside. Exercises for beginners are worth pairing with these corrections for finger independence alongside reading fluency.
Which free tools and apps help you practise reading music?
Free beginner sheet music and graded exercises are widely available through educational blogs, publisher sample pages, and video platforms, and a structured self-taught approach using these resources is genuinely viable if you follow the staff, alphabet, then rhythm sequence outlined above.
A basic metronome app on your phone covers all the tempo practice you need; you don’t need anything elaborate.
Flashcard apps for note-naming turn dead time (a commute, a queue) into useful drilling.
A dedicated rhythm accuracy tool lets you test subdivision timing away from the keyboard, which is useful when you want focused rhythm practice without an instrument in front of you.
General notation courses, such as basic notation lessons aimed at other instruments, can reinforce staff and rhythm reading since the fundamentals are identical across instruments.
Treat “note reader” apps that listen and tell you what you played as a supplement, never a crutch. They confirm accuracy after the fact, but they can’t replace the internal counting and landmark-spotting skills that make you a genuinely independent reader. Combine app practice with real keyboard time daily, and check in with a teacher periodically to catch habits that self-practice alone won’t reveal.
How do you read chord symbols and understand harmony?
Chord symbols appear as letters above the staff, such as C, Gm, or F7, and they tell you which notes to combine rather than which exact keys to strike. A bare letter © means a major chord built on that root; a lowercase “m” (Gm) means minor; a number (F7) adds a seventh note for extra colour and tension.
Most beginner and pop arrangements build chords from stacked thirds starting on the letter named. C major, for instance, combines C, E, and G. Learning the twelve major and twelve minor triads in this way is far faster than memorising each chord shape individually, because once you know the pattern, you can construct any chord from its root.
Chord symbols also reveal the harmonic skeleton beneath a melody, which matters once you start reading lead sheets rather than fully notated scores. A lead sheet gives you a melody line plus chord symbols and leaves the accompaniment to you, which demands genuine harmonic understanding rather than just note-reading.
Practise by picking a simple pop or folk lead sheet and playing just the chords in your left hand while your right hand plays the melody. Notice how chords often move in predictable patterns, such as C to G to Am to F, a progression that appears in hundreds of songs. Recognising these patterns by ear and by symbol together is what lets experienced players improvise convincingly over unfamiliar material, and it’s a skill worth building early rather than treating as advanced territory reserved for later.
How do repeat signs, codas, and volta brackets work?
Repeat signs are two dots stacked beside a thick double bar line, and they tell you to go back to the start (or to a matching repeat sign earlier in the piece) and play that section again. Missing a repeat sign is one of the most common ways beginners butcher a piece’s structure, even when every note is played correctly.
Volta brackets (also called first and second endings) handle sections that differ slightly each time through. A bracket labelled “1” shows what to play the first time through a repeat; a bracket labelled “2” shows what to play instead on the second pass, skipping the first ending entirely.
A coda is a closing section, marked with a circular symbol containing a cross, that you jump to near the end of a piece rather than playing straight through in order. You’ll typically see an instruction like “To Coda” pointing you toward that jump, paired with the coda symbol marking where to land.
Related navigation marks include D.C. (da capo, meaning return to the very beginning) and D.S. (dal segno, meaning return to a specific marked sign, usually a stylised S-like symbol). Both are typically paired with “al Fine,” which tells you where to actually stop rather than looping indefinitely.
The fix for navigation confusion is simple: before you play a piece for the first time, trace the entire route with your finger on the page, following every repeat, volta, and coda instruction in order. It takes thirty seconds and prevents the frustrating experience of getting lost mid-performance.
How do you interpret tempo markings correctly?
Tempo markings tell you how fast to play, and they appear at the start of a piece, usually in Italian, sometimes accompanied by a metronome marking such as “quarter note = 100,” which gives you an exact beats-per-minute target.
Common markings run from slowest to fastest: Largo (broad, very slow), Adagio (slow and stately), Andante (a walking pace), Moderato (moderate speed), Allegro (fast and lively), and Presto (very fast). You don’t need to memorise every Italian term immediately; focus on the handful that appear in your current repertoire and build vocabulary gradually.
A numeric metronome marking removes any ambiguity and is the most reliable way to nail a composer’s intended speed, since Italian terms carry some flexibility in interpretation across different eras and editions. Set your metronome to the marked number and play along, even if it feels uncomfortably slow at first. Beginners consistently rush tempo markings, particularly on pieces they’ve heard performed at full speed elsewhere, and this is one habit that a metronome corrects faster than any amount of self-monitoring.
Tempo changes mid-piece appear as new markings, sometimes paired with words like “accelerando” (gradually speeding up) or “rallentando” (gradually slowing down). Mark these in pencil the first time you spot them, the same way you’d mark a metre change, so you’re never caught off guard mid-phrase.
What do phrasing and expression marks add to a piece?
Phrasing marks show you where musical sentences begin and end, much like punctuation in written language. A slightly curved line above or below a group of notes (a phrase mark) groups them into one musical thought, distinct from a slur, which specifically means play those notes smoothly connected.
Expression marks go beyond basic dynamics to shape how a phrase feels emotionally. Terms like “espressivo” (expressively), “dolce” (sweetly), or “cantabile” (in a singing style) ask you to shape tone and touch rather than just volume or duration.
Breathing marks, sometimes shown as a small comma above the staff, indicate a tiny pause between phrases, similar to a singer taking breath. Ignoring these marks is a common reason beginner performances sound mechanical even when every note and rhythm is technically correct; the music runs together without any sense of where one idea ends and the next begins.
Practise phrasing by shaping the volume of a phrase like an arc: build slightly toward the middle or peak of a musical idea, then ease back toward its end. This single habit does more to make a piece sound musical than almost any other technique, and it works on genuinely simple pieces just as well as advanced ones.
How do you move from reading notation to actual playing technique?
Reading the page correctly and playing it well at the keyboard are related but separate skills, and beginners often stall by treating them as one and the same. Once you’ve identified a note and its rhythm, your hand still needs the right finger, the right hand position, and the right amount of physical relaxation to execute it cleanly.
Fingering numbers printed above or below notes (1 for thumb through 5 for the little finger) exist precisely to solve this problem before it becomes a habit you have to unlearn. Follow printed fingering even when an alternative feels more comfortable at first; editors choose fingerings that set you up for the next few notes, not just the current one.
Practise transitions between notes slowly enough that your hand can move smoothly rather than lurching. A useful habit is playing a passage at half tempo with exaggerated attention to how your fingers, wrist, and arm feel, since tension at slow speed almost always shows up as errors at full speed. Once physical ease is established slowly, speed tends to follow with far less struggle than trying to force fast playing before the movement pattern is genuinely comfortable.
Teaching perspective from Danpianostudio: three lessons that actually speed things up
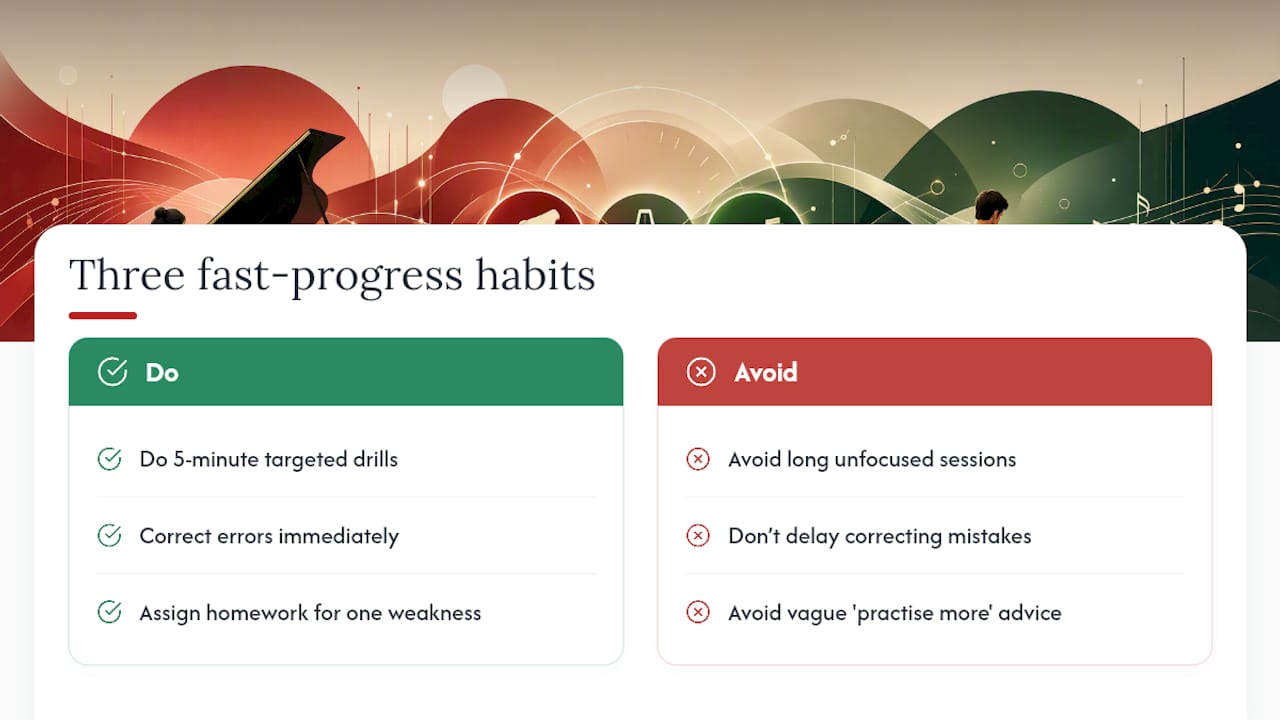
Three habits consistently separate adult beginners who progress quickly from those who stay stuck. First, short, targeted drills beat long unfocused sessions; five minutes of deliberate landmark-note practice does more than twenty minutes of vague noodling. Second, immediate correction matters more than most self-taught learners assume; catching a wrong finger or a misread note the moment it happens prevents it from becoming a habit that takes weeks to undo later. Third, homework should target one specific weakness, not “practise more,” because vague instructions rarely change behaviour.
Private lessons earn their value most clearly when progress stalls despite consistent effort, which usually signals a technique issue invisible from the student’s side of the piano. Danpianostudio’s structured sight-reading drills reflect exactly this classroom approach: isolate the skill, correct it immediately, then integrate it back into full playing. Adults returning to piano after years away often assume they’ve forgotten everything; usually they’ve just never had anyone diagnose the specific gap holding them back.
— Dan
If you’ve worked through the fundamentals here and want feedback that catches what self-practice can’t, Danpianostudio offers home piano lessons across London and online lessons for adult beginners, returning players, and anyone preparing for ABRSM or Trinity exams. Lessons are built around exactly the kind of targeted, corrective practice described above, tailored to where your reading and technique actually are, not where a generic course assumes you should be.
Sources
Recommended


Comments