


Piano Posture for Beginners Made Simple

A beginner can spot the problem quickly: the notes may be right, but after ten minutes your shoulders ache, your wrists feel stiff, and everything suddenly seems harder than it should. Good piano posture for beginners is not about looking formal at the keyboard. It is about making the instrument feel more natural under your hands, so technique, rhythm and confidence can develop without unnecessary tension.
Posture is one of the first things worth getting right because it affects almost everything else. A comfortable sitting position helps with finger control, tone, coordination and even reading. Whether you are learning a simple five-finger tune, preparing for an ABRSM or TRINITY exam, or trying your first jazz chords, the way you sit and move matters more than many beginners realise.
Why piano posture for beginners matters
When posture is off, the body compensates. If the bench is too low, the wrists often collapse. If you sit too close, the elbows get cramped and the shoulders lift. If you lean backwards, the fingers lose contact and control. None of this means a student is untalented. It usually means the setup is getting in the way.
The good news is that posture is teachable. In lessons, this is often one of the quickest fixes because small adjustments can produce an immediate improvement in sound and ease. A phrase that felt awkward can suddenly feel manageable once the body is balanced properly.
There is also a long-term reason to care. Beginners who practise with poor posture tend to build tension into their playing habits. Later on, when repertoire becomes faster or more expressive, those habits are harder to undo. Starting well saves time.
Start with the bench, not the hands
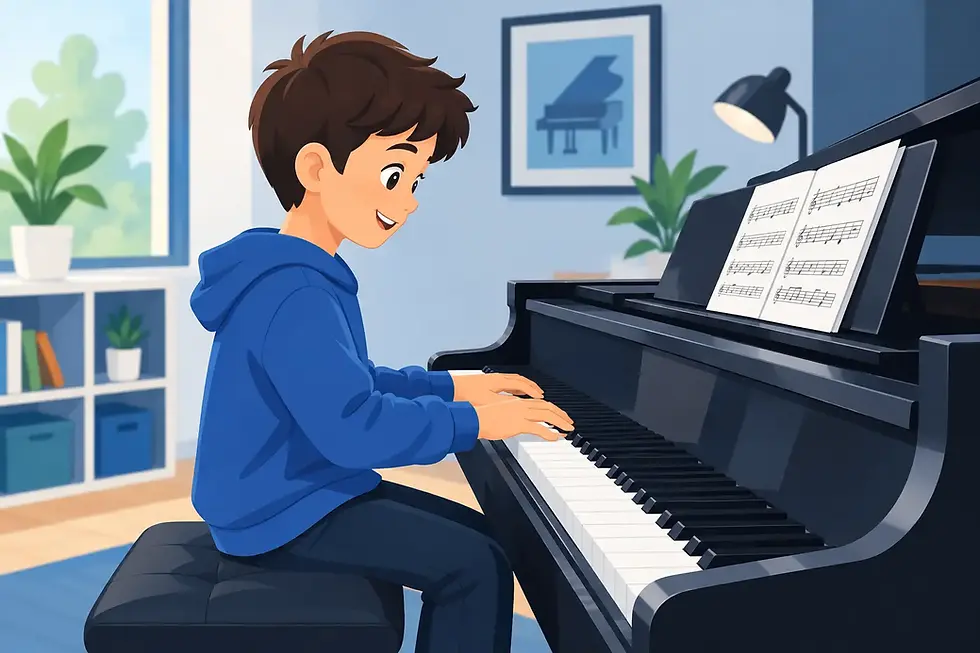
Most posture problems begin before a single note is played. Sit in the middle of the keyboard, roughly opposite middle C, unless a particular piece requires a different position. Choose a distance where your elbows can stay slightly in front of your body rather than tucked behind you.
Bench height matters just as much. As a general guide, your forearms should be close to level with the keys, or very slightly above them. If the seat is too low, you will reach upwards and tense the shoulders. If it is too high, the wrists may dip awkwardly. For children especially, this often needs checking regularly because growth changes everything.
Sit towards the front half of the bench rather than leaning against the back. That gives the torso freedom to move and helps you stay balanced. Your feet should rest firmly on the floor. If they do not, use a footstool. This is not a small detail. Unsupported feet often lead to fidgeting, sliding on the bench and general instability.
What the upper body should feel like
Think upright, but not rigid. The back should feel tall and supported, as if the head is floating comfortably above the spine. You are not trying to sit like a statue. You are aiming for a natural, alert position that allows movement.
Shoulders should hang freely rather than being pulled back or lifted. Many beginners try so hard to play neatly that they accidentally hold the whole upper body in place. That usually creates tension in the neck and arms. A better image is readiness rather than stiffness.
Your elbows should rest slightly away from the torso, not pressed in. This gives the hands room to move across the keyboard and helps with a rounded hand shape. If the elbows are trapped, the hands often flatten and the fingers lose strength.
Hand shape and wrist position
A beginner does not need an exaggerated curved hand, but a completely flat hand is usually unhelpful. Let the fingers rest on the keys with a gentle arch, as though you are loosely holding a small ball. The knuckles should look lifted and alive, not collapsed.
The wrist should remain supple and broadly level. It does move, of course, especially in phrasing and when changing position, but it should not sag below the keys or stay locked high above them. A dropped wrist can make the fingers work too hard, while a raised, fixed wrist can create strain.
One useful check is this: can you place your hand on the keys and feel both supported and free? If the answer is no, adjust before carrying on. Beginners often assume discomfort is normal effort. Usually it is just a sign that something in the setup needs refining.
Common posture mistakes beginners make
The most common issue is sitting too close to the keyboard. This makes the arms bend too sharply and encourages poking at the keys with isolated fingers. Move back slightly and the hands often settle immediately.
Another frequent problem is curling the body over the keys to read the music. If the score is too low, too far away, or hard to see, students instinctively hunch. Bringing the music stand into a clearer position, or sitting a touch taller, usually helps more than trying to force the shoulders back.
Then there is the habit of playing with all the effort in the fingers and none of the support from the arm. At beginner level, this can sound choppy and feel tiring. Good posture allows the whole playing mechanism to work together - back, shoulder, arm, wrist and finger. Not heavily, just cooperatively.
Piano posture for beginners at home
Home practice is where habits settle in, for better or worse. If you only check posture during a lesson and then ignore it all week, progress becomes slower than it needs to be. Before each practice, take ten seconds to notice your bench height, your distance from the keyboard and whether both feet feel grounded.
A mirror can be surprisingly helpful, particularly for online learners. Place it to one side and check whether you are leaning, lifting the shoulders or collapsing the wrist. You do not need to watch yourself constantly, but a quick visual check can catch problems early.
It also helps to keep practice sessions short enough that posture stays good. For a complete beginner, twenty focused minutes with proper setup is far better than an hour of slumped, distracted playing. Quality of repetition matters more than sheer duration.
How posture changes between classical and jazz playing
The foundations are the same in both styles: balanced sitting, free shoulders, supported hands and relaxed wrists. That said, the feel can vary slightly depending on what you are playing.
In classical pieces, especially those requiring control of tone and articulation, posture often needs to support a very clear sense of finger independence and phrasing. In jazz, where chord shapes, rhythms and freer movement across the keyboard are common, a flexible upper body can become even more noticeable. Neither style benefits from stiffness.
For beginners, the key point is not to copy a dramatic performance posture from a concert video. Stage presence and beginner setup are different matters. At the start, comfort and control should come first.
Posture for children, teens and adults
Children often need more physical support than adults realise. If the bench is too large, the piano too high, or the feet dangling, good technique becomes difficult even when the child is trying hard. Small adjustments make a big difference.
Teenagers sometimes slump from habit, especially after a long school day. They may understand the posture correction but need regular reminders to reset. Adults, on the other hand, often bring tension from desk work and hold the shoulders and jaw more tightly than they notice.
So while the principles stay consistent, teaching posture is never one-size-fits-all. It depends on height, age, flexibility and the instrument being used. That is one reason personalised lessons are so valuable.
A simple posture check before you play
Before starting a piece, pause and ask four quick questions. Am I sitting far enough back to move freely? Are my feet supported? Are my shoulders relaxed? Are my wrists level and easy? If one answer is no, fix that first.
This short routine builds awareness without making practice fussy. Over time, good posture stops feeling like an extra task and simply becomes part of how you play.
If you are learning with guidance, expect these details to be revisited often. That is not nit-picking. It is careful teaching. At Dan Piano Studio, this kind of adjustment is part of helping students build reliable technique from the beginning, whether they are learning for pleasure, working towards exams, or exploring both classical and jazz styles.
A good posture does not need to look perfect. It needs to let you breathe, move and listen well. If the body feels settled, the music has a much better chance to speak.


Comments