


Piano pedalling techniques: practise with your ears

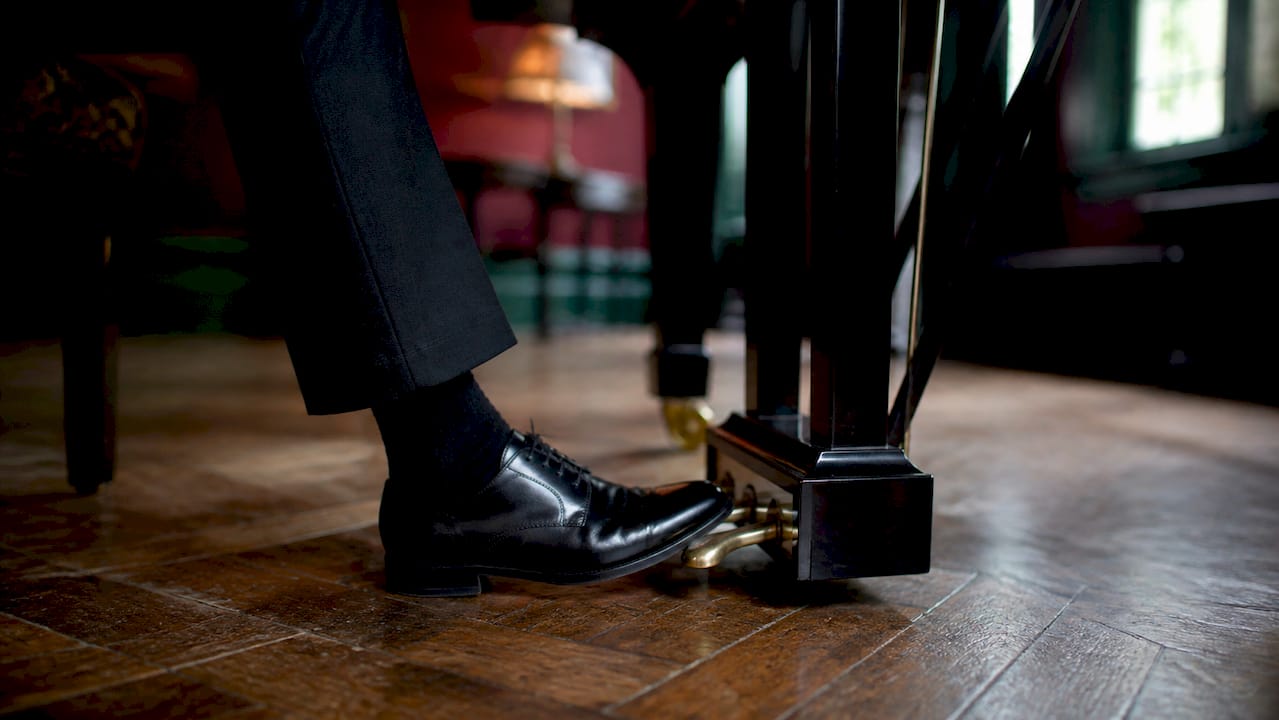
The sustain pedal is not a switch you press and forget. The single most useful rule in pedalling is this: let your ears decide when to change, not the beat. Clear the pedal when the harmony shifts, and you will avoid most of the muddiness that plagues early and intermediate players. Start with three exercises before anything else.
Timing drill: Play a simple four-bar chord progression in C major, hands alone, then add the pedal. Depress it just after each chord lands (not before), and lift it cleanly the moment the next chord sounds. Listen for the moment two harmonies blur together — that blur is your cue.
Half-pedal drill: Hold a single bass note and slowly press the pedal to roughly half its travel. Listen for the point where the dampers just touch the strings. That partial contact is half-pedalling, and it gives you a colour between full sustain and silence.
Finger pedalling drill: Hold a melody note with your finger while silently re-pressing it before lifting the pedal. The damper stays up, the note continues, and no second strike sounds.
What to listen for at all times: clarity of inner voices (can you hear the alto line?), bass sustain without boom, and whether adjacent harmonies are bleeding into each other.
Pro Tip: Record a short phrase on your phone with and without pedal. The playback will reveal blurring your ears miss in real time at the keyboard.
Key takeaways
Ear-led pedalling — listening for harmonic clarity and adjusting in real time — is the single principle that unifies every technique in this guide.
Point | Details |
Lead with your ears | Change the pedal when the harmony changes, not on a fixed beat. |
Practise hands-alone first | Build finger legato before adding pedal; the foot should enhance, not substitute. |
Half-pedal needs calibration | Test half-pedal depth on your specific instrument; digital pianos vary widely in hardware response. |
Match technique to genre | Use finger pedalling for Baroque, legato pedalling for Romantic, flutter pedalling for Impressionist repertoire. |
Danpianostudio | In-person and online lessons offer real-time pedalling diagnosis tailored to your instrument and repertoire. |
Table of Contents
How the three pedals work — and what changes on a digital piano
Most pianists spend their entire lives on the right pedal, but understanding all three changes how you think about colour and texture.
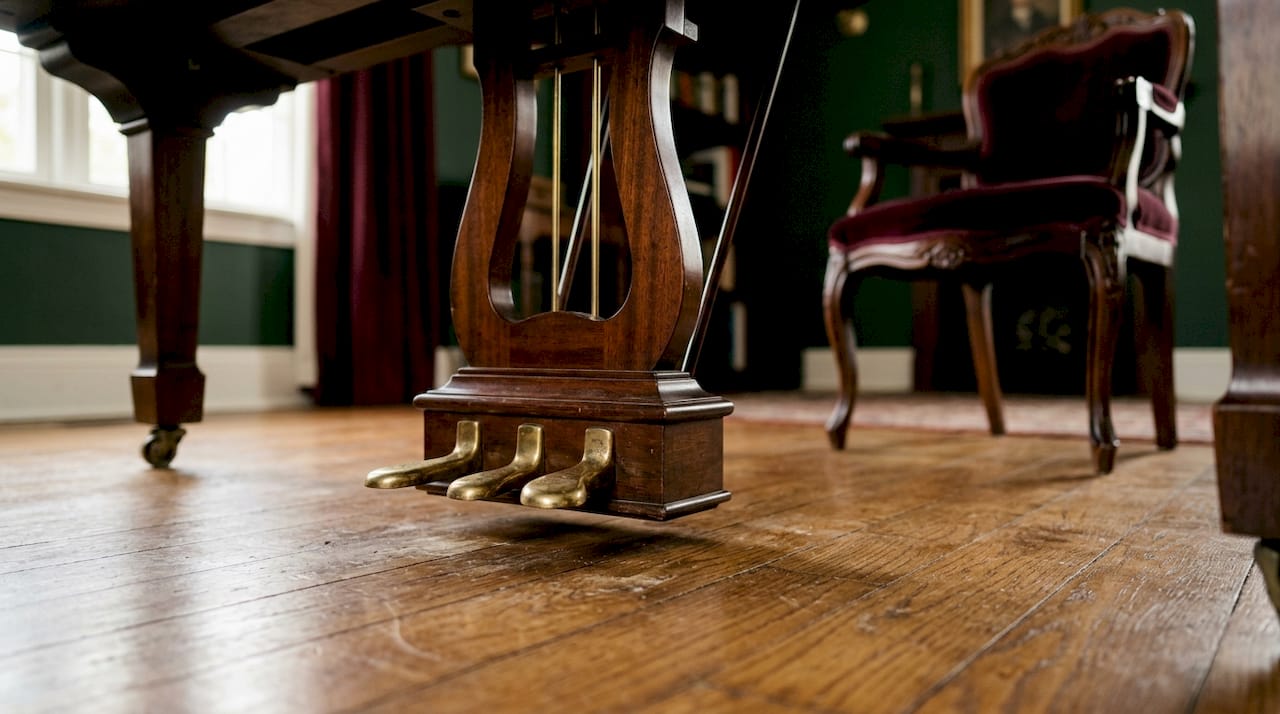
The sustain (damper) pedal
Pressing the right pedal lifts all the dampers away from the strings simultaneously, so every note you play continues to vibrate until you release it. The strings also respond sympathetically to each other, which is what gives a fully pedalled chord its warm, resonant bloom. Wikipedia’s overview of the sustain pedal notes that composers sometimes indicate continuous pedal with the direction senza sordini (without dampers) rather than the familiar Ped. marking — a detail worth knowing when you encounter early Beethoven scores.
The una corda (soft) pedal
On a grand piano, the left pedal shifts the entire action slightly to the right so that hammers strike one fewer string per note. The result is a softer, slightly veiled tone with a subtly different timbre. On an upright, the mechanism moves the hammers closer to the strings instead, which reduces volume but changes the colour less dramatically. Use it for passages marked pp or una corda where you need a genuinely different sound, not just a quieter one.
The sostenuto pedal
The middle pedal on a grand sustains only the notes that are already depressed when you press it, leaving all subsequent notes dry. It is genuinely useful in a handful of repertoire moments — the opening of Ravel’s Gaspard de la Nuit being a classic example — but many uprights replace it with a practice mute or a bass sustain pedal instead.
Acoustic vs digital: what the comparison actually means for technique
| Feature | Acoustic piano | Digital piano | | — | — | | Damper mechanism | Physical felt dampers on strings; continuous, analogue response | Sensor-based; response depends on pedal hardware quality | | Half-pedal control | Fully continuous; exact depth alters resonance in real time | Varies widely; entry-level instruments often use a simple on/off switch | | Una corda effect | Genuine timbre shift from hammer-string contact change | Simulated; quality varies by model | | Sostenuto | Fully functional on grands; limited on uprights | Often absent or simulated | | Room acoustics | Directly affected by room size and surface materials | Less affected; reverb is digital and fixed |
As Pianoo’s comparison of acoustic and digital pedal behaviour makes clear, many entry-level digital instruments cannot reproduce continuous half-pedal control. Before drilling half-pedal technique, press your pedal slowly and listen — if the sound jumps from silence to full sustain with no gradual transition, your hardware is binary and you will need an acoustic instrument or a higher-specification digital pedal to practise that technique properly.
Piano pedalling techniques: the six you need to know
Academic analysis of right-pedal technique treats pedalling as a spectrum controlled by timing, depth, speed, and duration rather than a set of fixed rules. These six named techniques cover that spectrum from the most common to the most colouristic.
Legato (syncopated) pedalling The standard technique for most tonal music. Depress the pedal fractionally after the first note or chord sounds, hold it through the phrase, then lift and re-depress immediately as the next harmony arrives. The brief overlap connects notes that fingers alone cannot sustain. When it works, you hear a seamless legato line with no audible click or gap between pedal changes.
Late pedalling (change on the beat) A refinement of legato pedalling where the change happens precisely on the new beat, not before it. Useful in faster tempos where a delayed change would blur two chords. Practise by counting aloud: lift on “one”, re-depress on the syllable immediately after. The foot and the beat become one motion.
Half-pedalling Partially depress the pedal so the dampers only lightly touch the strings. The result is partial resonance — more colour than no pedal, less blur than full sustain. Robert Estrin’s phrase “pedalling with your ears” applies here most directly: because every piano’s damper mechanism responds differently, the exact depth is something you calibrate by listening rather than by measuring. Try it in the bass register first, where full pedal tends to boom.
Flutter (vibrato) pedalling Rapid, shallow oscillations of the pedal — not full lifts, but quick partial releases and re-depressions. The effect clears accumulated harmonics without fully silencing the sound, creating a shimmering, blended texture. It is the characteristic technique for Debussy and Scriabin, where the goal is colour rather than clarity. Piano Fantasy’s guide to half-pedalling describes flutter pedalling as a colouristic tool for blending harmonies in Impressionist and late-Romantic repertoire.
Repeated (rhythmic) pedalling Pedal changes that follow a rhythmic pattern rather than harmonic changes — common in accompaniment textures where the left hand plays an Alberti bass or broken chord figure. The pedal typically changes on the first beat of each bar or on each new bass note. Keep the changes crisp and consistent; sloppy repeated pedalling creates rhythmic smearing rather than rhythmic clarity.
Finger pedalling No foot involved. Silently re-depress a key you are already holding so the damper stays lifted, then release the pedal cleanly. The note continues without a second audible strike. Pedagogical guidance from Pianoinspires recommends this as a reliable method to maintain legato without blurring, particularly in contrapuntal passages where the foot pedal would smear independent voices. It also works beautifully in Baroque repertoire where no pedal is stylistically appropriate but a single sustained bass note is needed.
Pro Tip: After practising each technique in isolation, record eight bars and listen back specifically for the target quality — seamless connection for legato pedalling, shimmer for flutter, silence between voices for finger pedalling. Your ears on playback are more reliable than your ears in real time.
Choosing your approach by genre and context
Genre is a starting point, not a rule. The room and the instrument always have the final say.
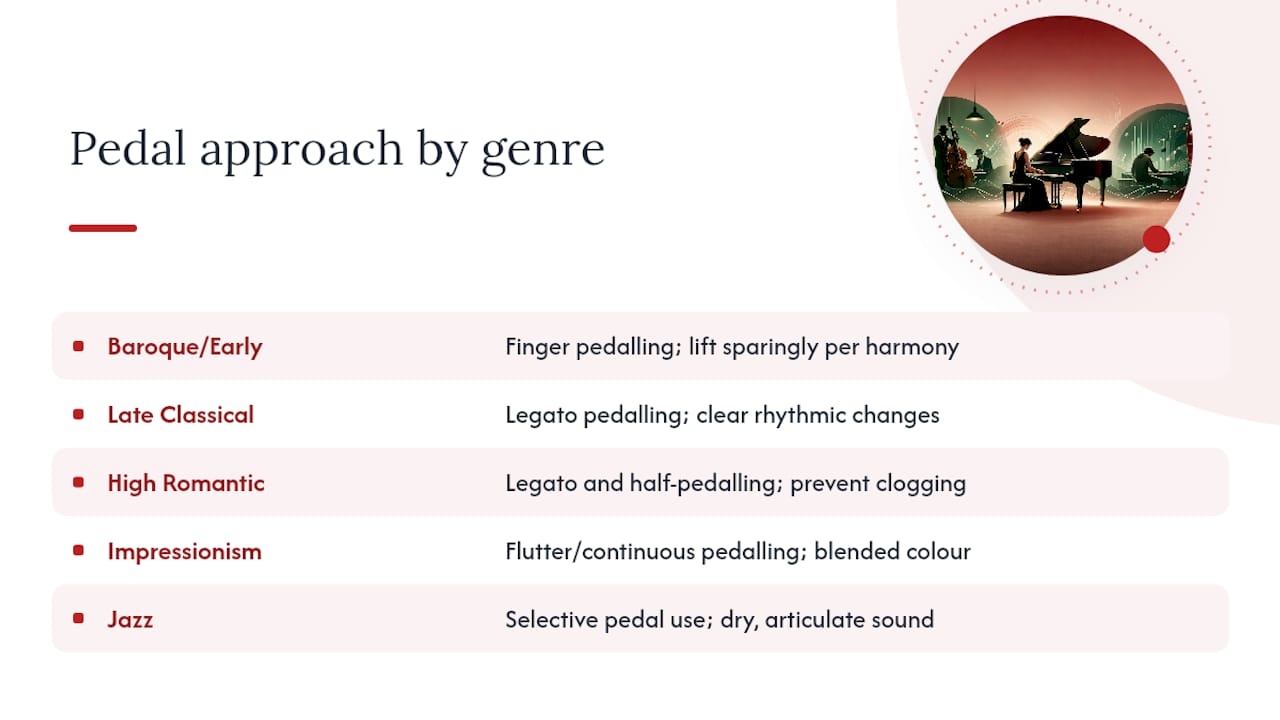
Baroque and early Classical repertoire (Bach, Handel, early Haydn) was written for instruments without sustain pedals. Finger pedalling and no pedal are the default. Where a sustained bass note genuinely needs the damper lifted, use it sparingly and change it with every harmony. The eScholarship study on pedalling across genres confirms that stylistic and historical considerations must inform pedalling decisions — applying Romantic sustain habits to Bach produces a harmonic fog, not a period sound.
Late Classical and early Romantic (Beethoven, Schubert) rewards legato pedalling with clear, rhythmic changes. Beethoven’s famous quasi una fantasia direction in the Moonlight Sonata’s first movement is often cited as an instruction to hold the pedal through all three chords — a deliberately blurred, atmospheric effect that was idiomatic on the fortepianos of his time but requires careful judgement on a modern concert grand, where the sustain is far richer.
High Romantic (Chopin, Brahms, Liszt) is where legato pedalling and half-pedalling earn their keep. Chopin nocturnes reward a slow, singing legato pedal that connects the melody over the bass. Brahms’s dense textures often need half-pedalling in the middle register to prevent the harmony from clogging. For genre-aware technique guidance, the jazz and classical technique resource at Danpianostudio covers stylistic differences in more depth.
Impressionism (Debussy, Ravel) is flutter pedalling territory. The goal is blended colour, not harmonic clarity. Debussy’s La cathédrale engloutie asks for a wash of sound that only continuous or flutter pedalling can produce. In a reverberant room, reduce the pedal depth; in a dry studio, you may need more.
Jazz uses the sustain pedal far more selectively than classical playing. Comping textures and walking bass lines usually need a dry, articulate sound. Pedal appears in ballads and in sustained chord voicings, but rarely in the rhythmic drive of a swing groove.
Room acoustics matter more than most players realise. A large, reverberant hall amplifies every pedal change; what sounds clean in a practice room becomes muddy on stage. Test your pedalling in the actual performance space whenever possible, and be prepared to use less pedal than you rehearsed.
A teacher-tested practice routine for foot timing and half-pedal control
The most reliable path from knowing about a technique to using it musically is a structured daily sequence. Pianoinspires’ pedagogical guidance recommends hands-only practice first, then reintroducing the pedal in measured stages — and that sequence is the backbone of this routine. For broader practice planning, how to practise piano effectively offers a useful framework to sit alongside this.
Silence and listening warm-up (3 minutes). Sit at the piano without playing. Press the sustain pedal and release it slowly, listening for the mechanical sound of the dampers. Then play a single chord, hold the pedal, and listen to the decay. This resets your ears before technique work begins.
Hands-alone legato (5 minutes). Choose a short phrase from your current repertoire. Play it hands alone, connecting every note with the fingers as if the pedal did not exist. This builds the finger legato that the pedal should enhance, not replace.
Single-chord change drill (5 minutes). Play two chords alternately — C major and G major, for example. Practise the legato pedal change: depress after the first chord, lift and re-depress the instant the second chord sounds. Use a metronome at 60 bpm. The target is a clean change with no audible gap and no harmonic blur.
Half-pedal register drill (5 minutes). Play a sustained bass note (low C) with the pedal at roughly half depth. Slowly add notes in the middle and upper registers. Listen for the point where the bass blooms without swamping the treble. Adjust the pedal depth until the balance is right. Repeat in different registers.
Finger pedalling drill (5 minutes). Play a two-voice passage — a melody and a bass line. Hold the bass note silently with your finger, depress the pedal, then release the pedal while keeping the finger down. The bass note continues. Practise until the re-depression is genuinely silent and the transition is smooth.
Short phrase integration (10 minutes). Take 8–16 bars of a piece you are learning. Apply one technique at a time: first legato pedalling, then half-pedalling in the busiest bars, then finger pedalling where voices need independence. Record each version and compare on playback.
Progress checkpoints:
Clean legato pedal changes at 60 bpm with no harmonic blur across three consecutive trials.
Audible difference between full and half-pedal in the bass register.
Finger pedalling with no second strike audible on playback.
Pro Tip: In lessons, Dan asks students to narrate what they hear as they play — “I can hear the C and the G blurring” — before making any pedal adjustment. Naming the problem out loud trains the ear faster than correcting by instinct.
For building the hand independence that underpins piano technique exercises, that resource pairs well with the drills above.
Why does my pedalling sound muddy? Common problems and fixes
Most pedalling problems fall into three categories: wrong timing, wrong depth, or wrong technique for the instrument.
Harmonic blur is the most common complaint. The cause is almost always a pedal change that happens too late — the new harmony arrives while the old one is still ringing. Fix: practise the single-chord change drill above at a slow tempo, and listen specifically for the moment of overlap. If the blur persists, try changing the pedal slightly earlier, on the beat rather than after it.
Rhythmic smearing sounds different from harmonic blur — the music loses its pulse rather than its pitch clarity. This usually means the pedal is being held through rests or through rhythmic articulations that need silence. Shorter pedal windows, or no pedal at all in those bars, will restore the rhythm.
Booming bass in the lower register is a sign that full pedal is too much for the instrument or room. Switch to half-pedalling in the bass and listen for the point where the fundamental note sustains without the overtones piling up.
Missed changes — a gap of silence where the pedal lifts too early and re-depresses too late — are a foot-timing problem. Slow the tempo and practise the change as a single, fluid motion: lift and re-depress in one continuous movement rather than two separate actions.
Adapting to a bright or reverberant instrument: on a piano with a long, bright sustain (many Steinway concert grands in large halls), use less pedal depth and change more frequently. On a dull or short-sustain instrument (many uprights, some digitals), you may need to hold the pedal slightly longer to compensate. Yousician’s practical guidance on pedal timing recommends shorter, more precise changes for busy textures — a useful default when you are unsure.
Reading pedal markings in scores and annotating your own
Pedal notation is less standardised than most pianists assume. The eScholarship study and Wikipedia’s sustain pedal entry both note that composers and editors use several conventions, sometimes inconsistently.
Ped. or the stylised 𝒫 symbol: depress the pedal at this point.
Asterisk (*): release the pedal.
Horizontal line with a bracket at each end: depress where the line begins, release where it ends. More precise than Ped./* pairs.
Senza sordini: “without dampers” — an older direction meaning hold the pedal continuously, used by Beethoven in the Moonlight Sonata.
No marking: common in Baroque and early Classical editions. Apply stylistic judgement rather than assuming no pedal is needed.
A simple workflow for annotating your own pedalling in a score:
Play the passage without pedal and mark every harmony change with a pencil bracket.
Add basic Ped./* marks at each bracket, then play and listen.
Refine: where the change is too abrupt, add a half-pedal symbol (a small “½” above the line); where voices need independence, write “f.p.” (finger pedalling) above the relevant bar.
Write short verbal cues in the margin for performance reminders: “less pedal — reverb”, “flutter here”, “bass only”.
Keep your annotations light and erasable. Pedalling decisions change between practice room and performance, and a score covered in permanent marks becomes a straitjacket.
Repertoire to practise each technique in real music
The most efficient way to internalise a pedalling technique is to find a short excerpt where it is the obvious solution, then A/B test two different approaches with a recording device.
Legato pedalling: Chopin Nocturne in E-flat major, Op. 9 No. 2. The melody needs to sing over the left-hand accompaniment; legato pedal changes on each new bass note are the standard approach. Record eight bars with and without pedal, then with a late change versus an early one. The classical piano repertoire guide at Danpianostudio lists graded pieces where this technique appears at different levels.
Half-pedalling: Beethoven’s Moonlight Sonata, first movement. Full pedal through the repeated triplet figure produces a wash that many modern pianos cannot sustain cleanly. Half-pedalling the middle register while holding the bass note gives the atmospheric blur Beethoven wanted without losing the harmonic outline.
Flutter pedalling: Debussy’s Clair de lune, bars 27–28. The rising arpeggio passage benefits from continuous flutter pedalling that blends the harmonics without fully clearing them between each new chord.
Finger pedalling: Bach’s Prelude in C major from the Well-Tempered Clavier, Book I. No sustain pedal is stylistically appropriate, but the continuous broken-chord texture benefits from finger pedalling on the bass note of each bar to maintain the harmonic foundation.
Micro-project: Choose any 8–16 bar excerpt. Prepare two complete pedalling versions — one with full legato pedal throughout, one mixing half-pedal and finger pedalling. Record both. On playback, note which inner voices are clearer in version two and whether the bass is more or less controlled. That comparison teaches more than an hour of reading about technique.
For guidance on which pieces to choose at your level, the best classical piano pieces to learn first resource at Danpianostudio is a practical starting point.
Why ear-led pedalling is the only kind worth teaching
Most students arrive expecting a rule: “change the pedal on every beat” or “always use half-pedal in Debussy.” Those rules exist because they are easier to explain than the truth, which is that pedalling is a listening skill first and a foot skill second.
The foot mechanics are learnable in a few weeks of focused drilling. What takes longer — and what separates a musical performance from a technically correct one — is the ability to hear a problem before it fully develops and adjust in real time. A reverberant hall, a piano with a longer-than-usual sustain, a student who has never played on a concert grand: every new instrument and room demands a fresh calibration. No printed score can account for that.
What I find most telling in lessons is the moment a student stops looking at their foot and starts listening to the result. That shift — from mechanical compliance to musical listening — is when pedalling actually improves. It usually happens fastest when students record themselves and listen back critically, which is why the recording exercises in this guide are not optional extras.
The techniques here are tools, not destinations. Half-pedalling is not inherently better than legato pedalling; flutter pedalling is not more sophisticated than a clean change on the beat. The right technique is whichever one makes the music sound the way you intend it to sound. That judgement is what lessons are for.
Pedalling coaching at Danpianostudio
Pedalling is one of the hardest skills to develop without a teacher in the room — or on screen — who can hear exactly what you are producing and adjust the instruction in real time. At Danpianostudio, pedalling technique is woven into every lesson from the earliest stages, not treated as an advanced topic to tackle later.
Whether you are working through your first legato changes or refining half-pedal control for a Chopin nocturne, lessons are structured around your instrument, your repertoire, and your ears. Home piano lessons are available across Central London, Camden, and King’s Cross, which means coaching happens on your own piano — the instrument you actually perform on. Online piano lessons are equally effective for pedalling work: a second camera angle on the foot and a recording sent after the session give you the same diagnostic feedback as an in-person lesson. Book an initial lesson and ask specifically for a pedalling-focused session to get started.
Sources
These resources were used to prepare this guide and are worth keeping open as workshop references while you practise. Treat them as starting points for your own listening experiments, not as prescriptive rules.
Recommended


Comments